Helm – How to Simplify Kubernetes Management?
Hi! Today, as Innokrea, we’ll tell you what Helm is, how to use it, and how it simplifies working with a Kubernetes cluster. If you’re unfamiliar with containers or Kubernetes technology (K8S), we encourage you to check out our previous articles on the topic.
What is Helm and Why Is It Worth Using?
Helm is a package manager for Kubernetes. But what does that mean exactly? If you’ve worked with Linux, you’ve likely encountered commands used for installing programs like apt, apk, or yum. These are package managers, enabling you to perform three key actions: install, uninstall, and update packages in the operating system. Similarly, Helm allows you to carry out these actions within a Kubernetes cluster to deploy applications such as databases or queuing systems. Here are several reasons why using Helm is advantageous for application deployment:
- Simplified Deployment – Anyone who has written Kubernetes manifests knows that it can be a complex process prone to errors. Helm provides the ability to manage applications using so-called „charts,” which are packages containing all the necessary Kubernetes manifests (e.g., services, deployments, secrets, configmaps).
- Helm Templates – Helm allows for YAML file templating. This means you can use specially marked variables, such as replicas: {{ .Values.replicas }}, for frequently changing values you’d like to modify. These values are then managed in the values.yaml file. This makes it easy to adjust container or Kubernetes settings, such as the number of replicas, image versions, or domain names. Changing these values is done by editing a single file, which acts as a central point for managing application configuration.
- Simplified Rollbacks – Helm can manage the history of deployments (releases), allowing for easy rollbacks to a previous version of an application if issues arise with a new deployment. This improves reliability and availability.
- Intelligent Deployments – Helm can recognize which Kubernetes objects need to be created first to ensure the application’s configuration works properly, such as configmap or secrets objects used for configuration in Kubernetes.
- Shifted Responsibility – The responsibility for providing Helm charts typically lies with the software provider. This means client DevOps teams are relieved of this task, and their configurations remain up-to-date and correct (assuming the provider delivers accurate and updated charts). This minimizes client-side errors and simplifies support when issues arise.
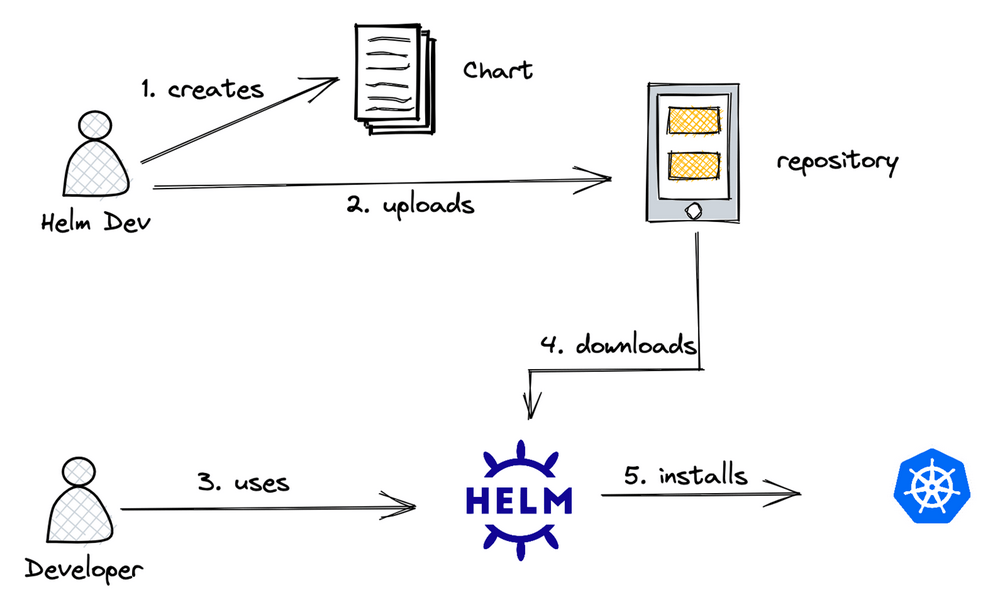
Figure 1 – Creating and using Helm charts – division of responsibility. Source: devopsschool.com
Basic Concepts Related to Helm
Like most technologies, Helm introduces its own terminology to describe the objects and actions needed to manage the solution. These include:
- Chart – The basic unit of packaging an application’s configuration in Helm. In other words, it’s a collection of all YAML files and templates that define the Kubernetes objects necessary to deploy an application.
- Templates – Found in the templates folder, these contain YAML manifest files enhanced with the following syntax: {{ .Values.variable_name }}.
- Values – The values.yaml file contains default values used by the templates.
- Release – A deployed chart running on a Kubernetes cluster. Each time the helm install command is used, a new release is created.
- Rollback – A mechanism to revert to a previous release version in case of issues with updating to a new version.
- Repozytorium – A remote storage location for Helm Charts.
Remote Repositories and Basic Commands
Helm does not include pre-configured repositories in its latest versions. It functions similarly to solutions like GitHub or GitLab. Various remote repositories exist where companies providing specific solutions can make them available to their clients. Examples of such repositories include ArtifactHub and Bitnami. Here are some basic commands for working with Helm:
- helm repo add <repository_name> <url>: Adds a remote repository to Helm;
- helm repo list: Displays added repositories;
- helm search repo <application_name>: Searches for applications available within the added repositories;
- helm install <release_name> <application_name>: Installs a Helm chart;
- helm repo remove <repository_name>: Removes an added repository;
- helm uninstall <release_name>: Uninstalls a Helm chart.
Example Installation
To demonstrate how Helm works, let’s use it to deploy Harbor software on a local Minikube cluster. To install the cluster and Helm software, refer to the documentation for Minikube and Helm. After running the minikube start command, you should have access to the cluster. Let’s add the remote Bitnami repository to Helm using the command helm repo add. Then, try to find the repository for Harbor, which is software for storing Docker images, using the command helm search repo.
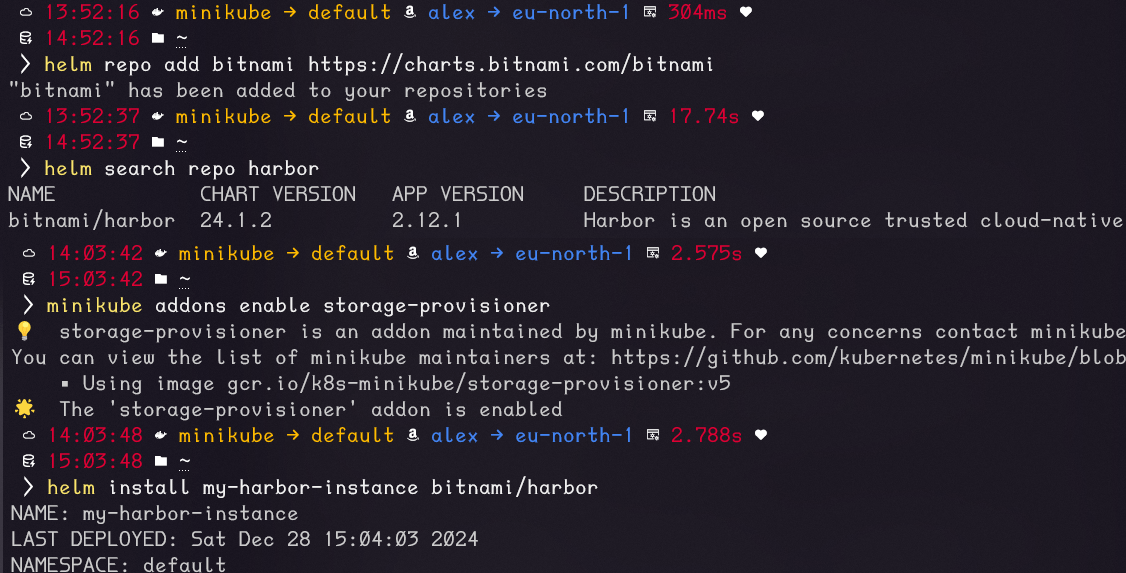
Figure 2 – Subsequent Commands for Our Exercise
To ensure that Harbor can be correctly installed, you must also enable the Minikube storage-provisioner add-on. The installation is performed using the command helm install <release_name> <application_name>
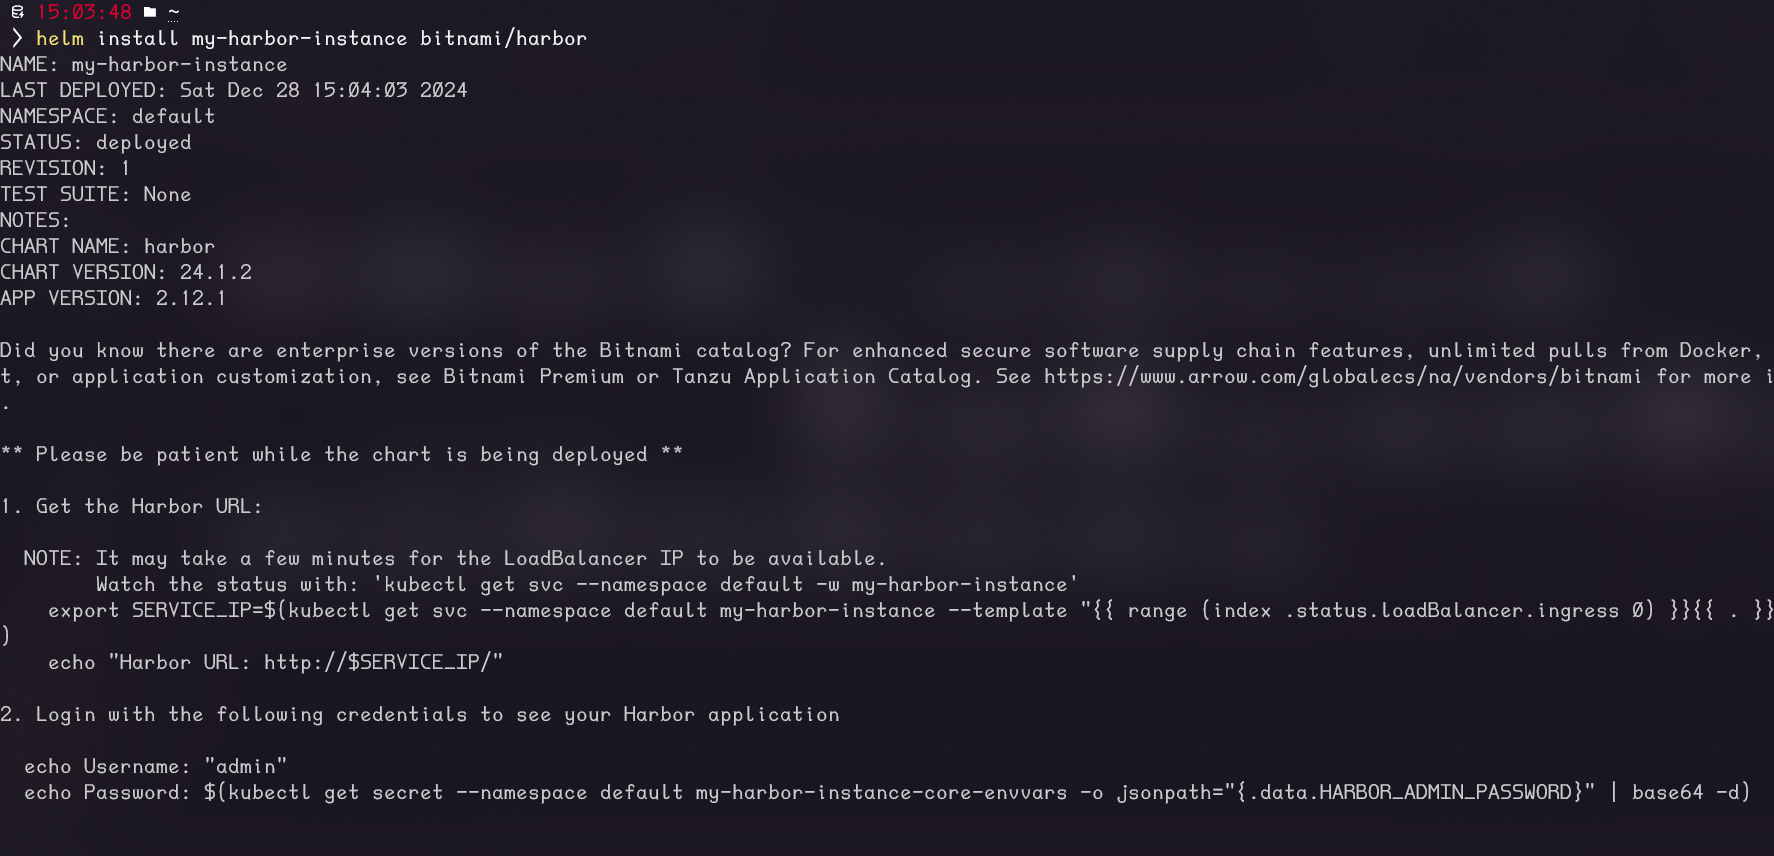
Figure 3 – Installation Output with Instructions for Using Harbor
After the installation, you can display the created Kubernetes objects using kubectl. These represent a large number of resources required for a single application to function. Manually creating them would be a challenge for an administrator deploying the application using only Kubernetes YAML manifests.
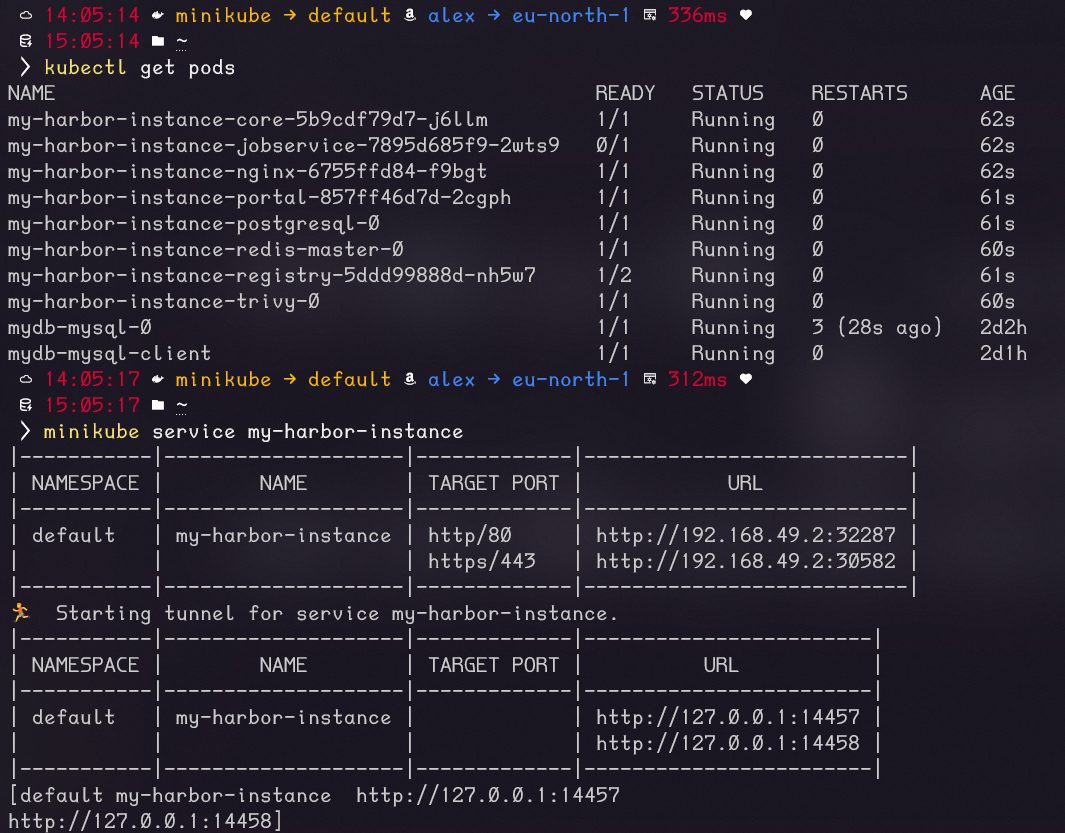
Figure 4 – Kubernetes Resources and Exposing the Harbor Instance Outside the Cluster
After exposing the Harbor instance outside the cluster, you need to retrieve the content of the secret storing the administrator password. This can be done using the command shown in Figure 5.
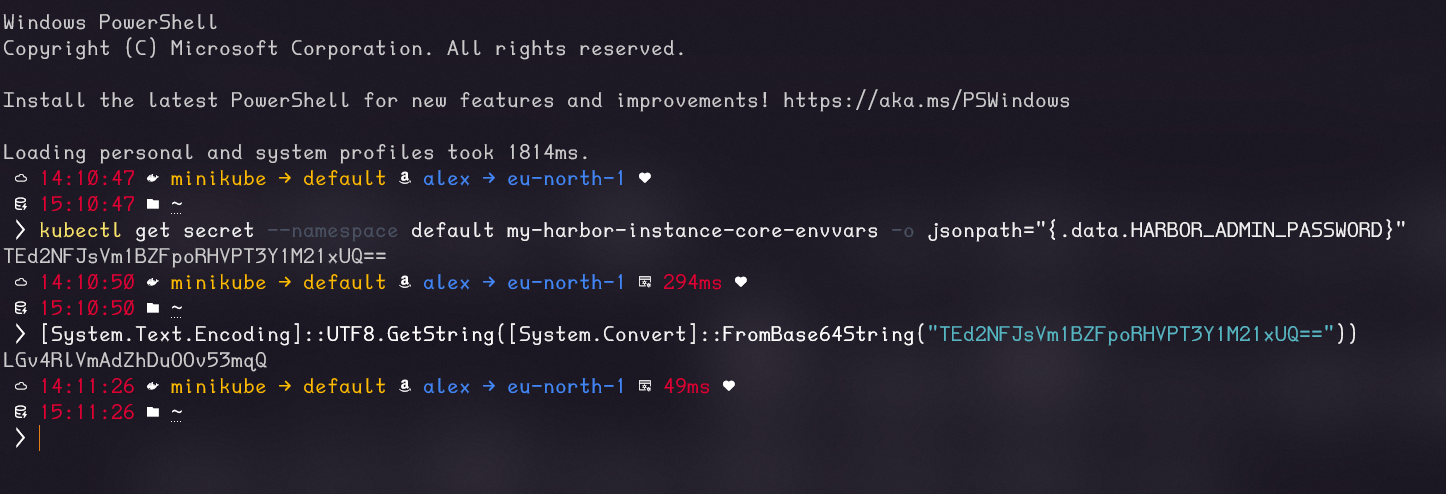
Figure 5 – Retrieving the Administrator Password from the Secret Using kubectl
You can now log in to Harbor’s administrative panel using the instructions in Figure 3 and the retrieved secret.
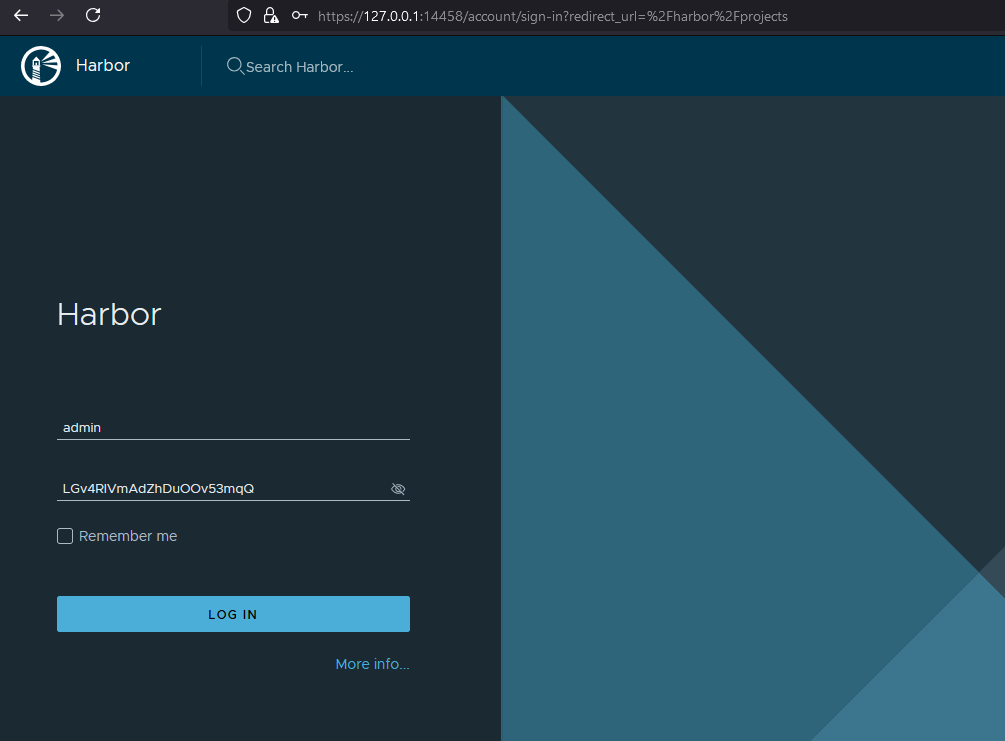
Figure 6 – Logging into Harbor
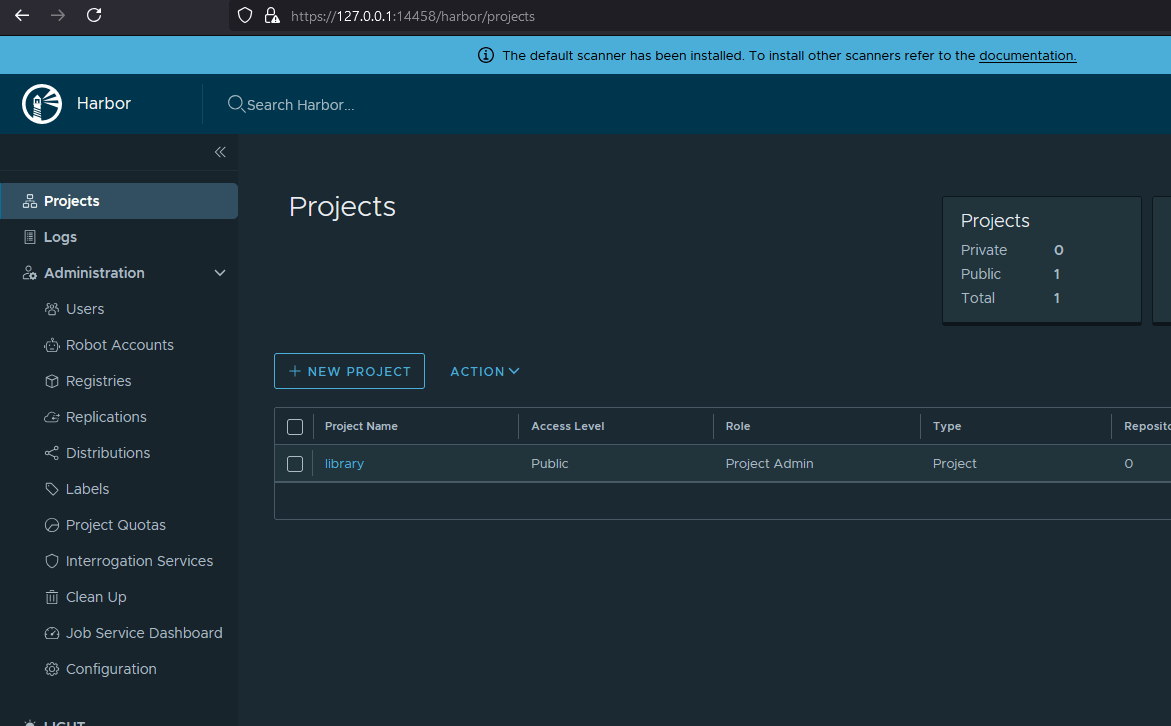
Figure 7 – Harbor’s Administrator Panel After Logging In
Summary
We hope you found something valuable in today’s post! We demonstrated why using Helm is worthwhile and how it simplifies deployments, even for complex solutions like Harbor. If you’re curious about more Helm secrets, stay tuned for next week’s article! See you then!